©
Madshus

Learning cross-country skiing is easier than you think! The classic style is similar to natural walking movements and is therefore ideal for beginners. Many people master the basics after just a few days because, compared to the more demanding skating technique, the classic style requires less strength and balance and allows you to set a more relaxed pace.
Ever since biathlon and Nordic combined became so exciting again, enthusiasm for cross-country skiing has grown enormously. When done correctly, cross-country skiing is one of the most effective winter sports: it promotes stamina, fitness, endurance and fat burning. At the same time, it is probably the most beautiful experience to be active in almost untouched winter landscapes. Another advantage: cross-country skiing is significantly cheaper than alpine skiing, as expensive ski passes are often not necessary!
As a cross-country skiing beginner, you need to consider the following three things:
1. Choose your technique: classic (easier) or skating (faster)
2. Rent equipment: a cheaper way to get started without a large investment
3. Choose a route: special practice trails or short, blue trails for your first few metres
That's why we've summarised everything you need to know about technique, equipment and your first steps on the trail in this guide – so you'll be well prepared for your first cross-country skiing adventure.
First, the good news: you don't have to be a super athlete! If you have a solid basic level of fitness – comparable to a relaxed 30-minute jog – you can get started right away. Optionally, you can also prepare yourself with ski gymnastics. In a beginner's course, you will learn the basic technique of classic cross-country skiing. After just 1-2 hours, you will be able to move independently on flat terrain and enjoy your first gliding phases. Even without a course, you can often achieve your first successes in no time and quickly master short, easy routes.
Your realistic learning curve:
As with jogging, practice makes perfect. With every kilometre you ski, you improve your balance, your gliding phase and your pole technique. The great thing is that you can enjoy nature from day one – perfect technique comes with time!
Before you start cross-country skiing, you need to ask yourself: classic or skating? Both techniques have their advantages and differ significantly in terms of movement, difficulty and speed.
In classic cross-country skiing, you move in a diagonal stride on a specially groomed trail
When skating, you move similar to inline skating or ice skating. Your feet and skis are held in a V position, you push yourself forward sideways and glide on a smooth, groomed snow surface without track guidance. However, skating requires significantly more strength, endurance, balance and coordination
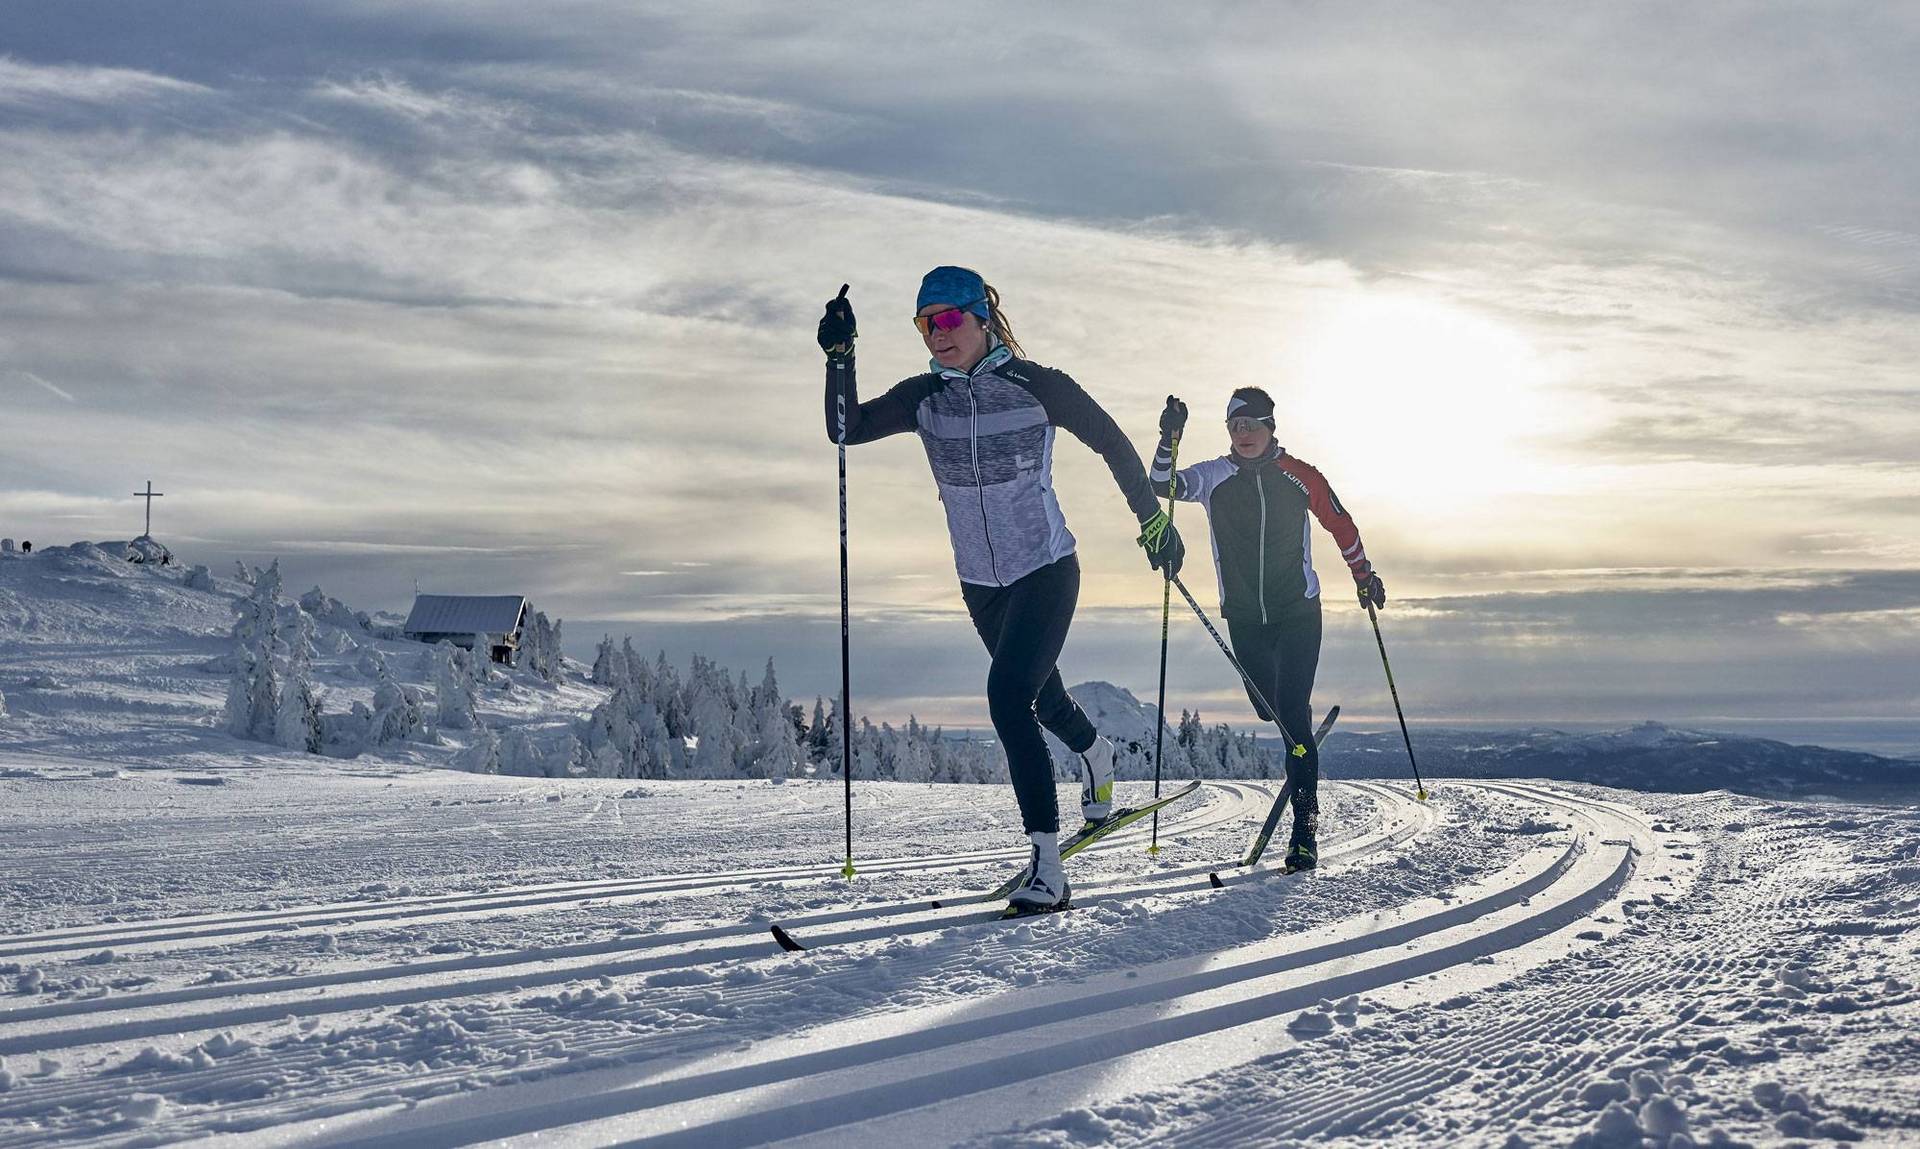
Classic cross-country skiing on the prepared cross-country ski trail
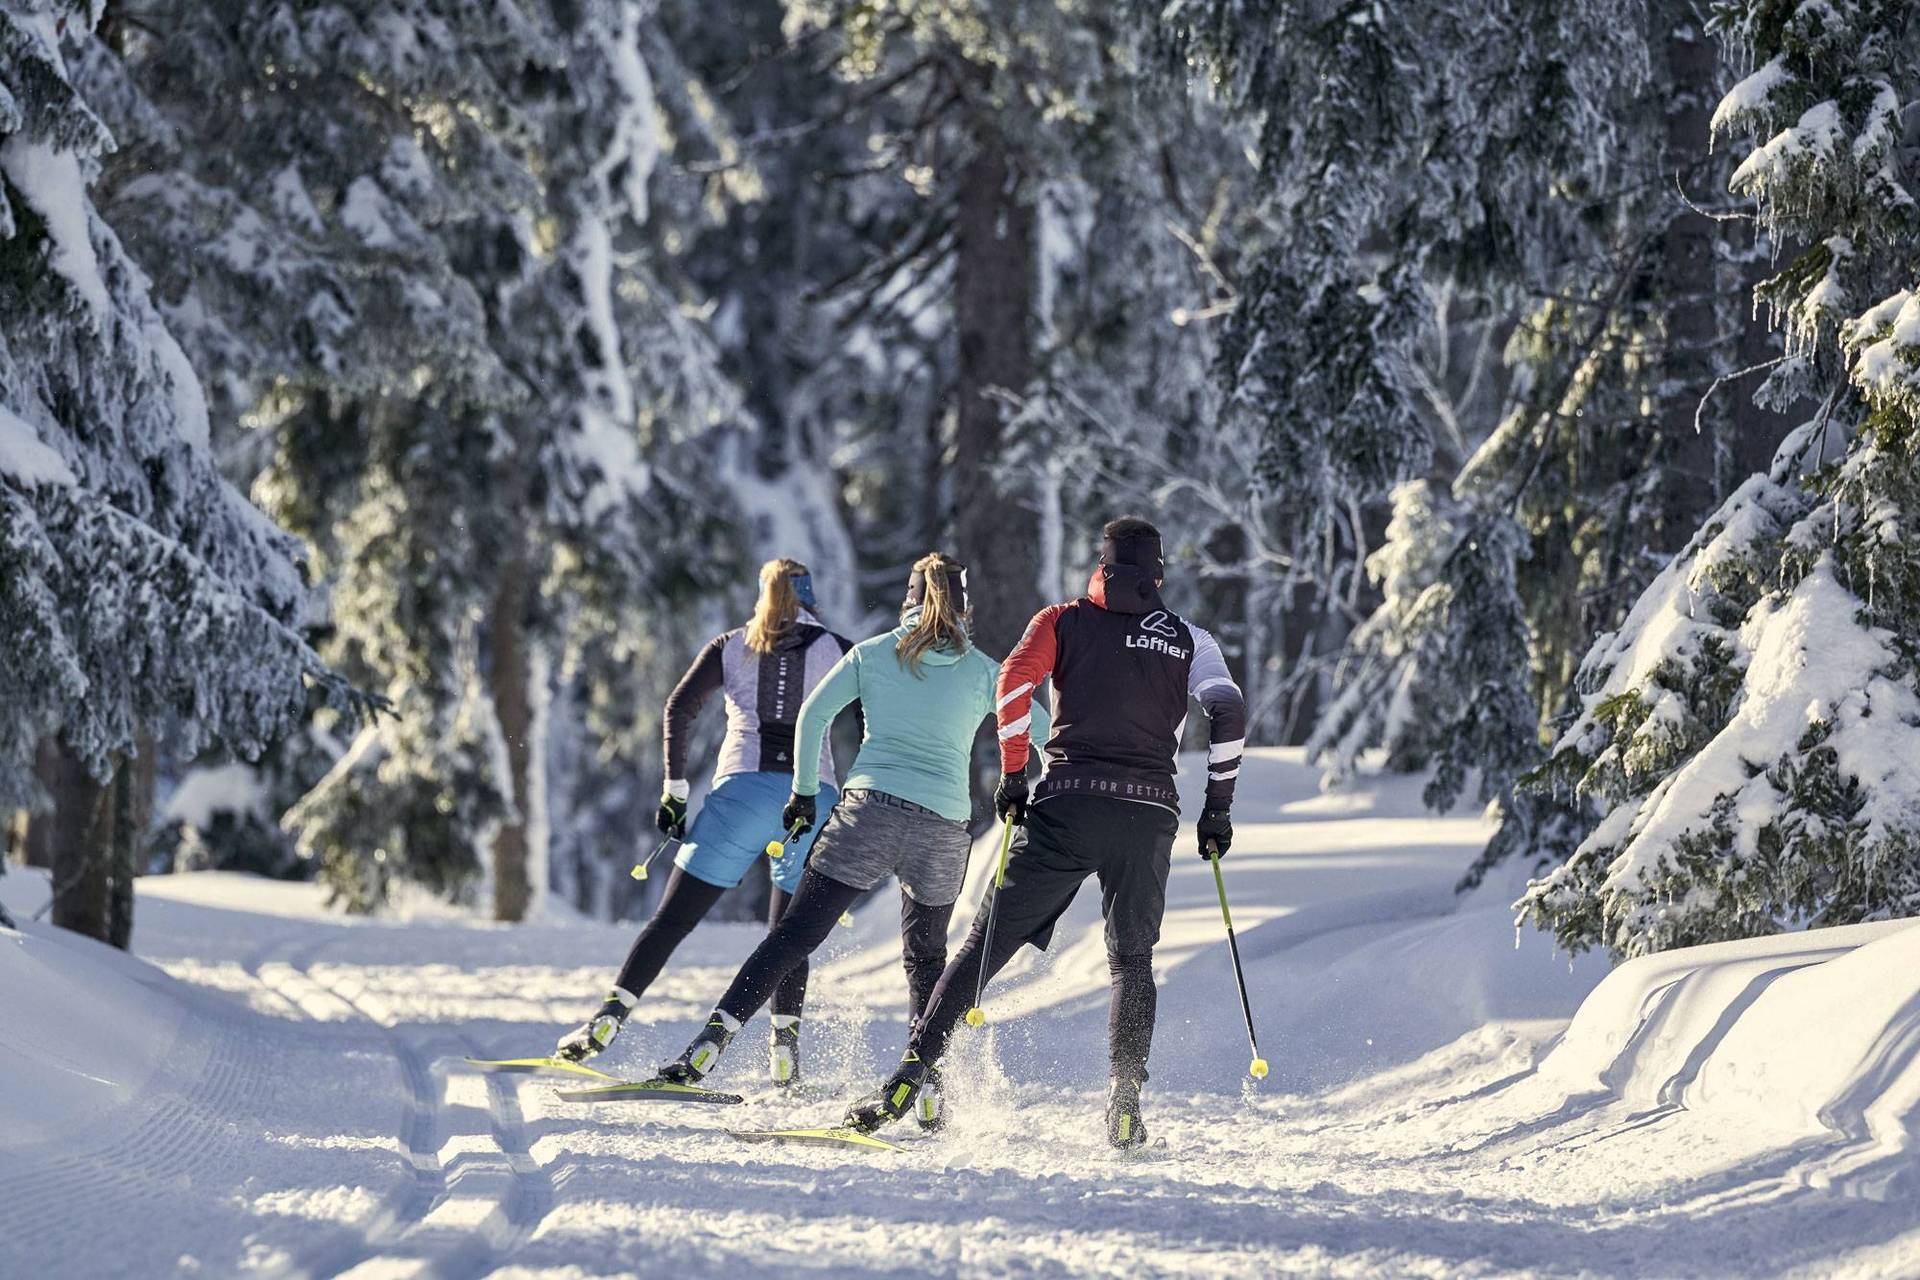
The skating technique of cross-country skiing
Basically, the classic style of cross-country skiing is more suitable for beginners, as it requires less strength and less balance. In addition to the simpler technique, classic cross-country skiing also gives you the opportunity to familiarise yourself with the equipment, the trail and the movements at your own pace. After 5-10 tours and once you have mastered the basics, you can try your hand at skating.
However, if you regularly go inline skating or ice skating, you already have the necessary balance and experience in terms of footwork and can therefore start with the skating technique right away. But it's best to concentrate on one technique at first and not switch back and forth between the two.
Our tip: Hire cross-country skiing equipment for both techniques and try them both out in one weekend. This will help you quickly discover which style suits you best and is more enjoyable!
The good news: cross-country skiing is significantly cheaper than downhill skiing! To save even more money, we recommend renting equipment when you're just starting out – this way, you can take your time to see if you like the sport before investing in your own equipment. Use the ski hire service from SPORT 2000 rent. In our shops, you will not only receive top-quality, well-maintained equipment, but also expert advice and equipment that is optimally adapted to your needs, such as your height, weight and technique.
The equipment includes:
For classic cross-country skiing, your skis should generally be 20 cm longer than your height. We also recommend choosing a wide model, as this requires less balance.
The length of your cross-country ski poles should reach approximately to your armpit and can be calculated as follows:
Height in cm x 84 cm
Cross-country boots have a low shaft for a flexible ankle and a soft, flexible sole.
For the skating technique, you need cross-country skis that are 10 cm longer than your height. Even when skating, cross-country skiing beginners should opt for wider models as they need to maintain their balance. Make sure you get lightweight cross-country skis so that it is not too strenuous for your legs.
When skating, your cross-country poles
Body height in cm x 89 cm
To ensure better power transfer during lateral movements, cross-country boots for the skating technique have a slightly higher shaft and a stiffer sole than models for classic cross-country skiing.

Regardless of the technique, you will need the following equipment to learn cross-country skiing:
Even if this may sound like very little clothing for winter temperatures, you will quickly realise that it is easily enough. Cross-country skiing is an intense endurance sport – so you will work up a good sweat! Many beginners dress too warmly and then overheat on the trail. Rule of thumb: you should feel slightly cool when you start. Breathability is a must! Cotton retains moisture and cools you down. It is therefore better to opt for functional underwear made of polyester or merino wool. The clothing you wear for jogging or cycling in winter works perfectly!
Cross-country skiing began several centuries ago with the classic technique. In 1843, the first cross-country skiing competitions were held in Norway as endurance races. This technique has been refined over the years and has become a true national sport.
There are three key aspects to classic cross-country skiing: targeted pole use, the correct footprint and optimal gliding. There are two basic techniques that you should master:
The diagonal stride is the most important technique in classic cross-country skiing.Here, the legs and arms are used diagonally, as in Nordic walking or natural walking movements. This means that when your right foot moves forward, your left arm also moves forward (and the right pole is planted). Then it changes: left foot and right arm/pole.
The movement in detail:
Always make sure you glide for as long as possible and maintain your balance. This will help you to distribute your strength much better and use it more effectively. The pole should always be planted in the snow at the level of the binding, with your arm slightly bent, stretched forward and then pushed backwards.
With double pole, all the work is done by the upper body and arms. The legs stand parallel in the track and simply glide along.
This is how the double pole push works:
This is the significantly more strenuous variant of classic cross-country skiing and was established in addition to the diagonal stride. It relieves the legs, trains the upper body in particular and is often used on flat or slightly sloping sections of the trail.
The skating technique is slightly faster and more challenging than the classic technique and requires more endurance, balance and technique. This is because you are not skiing on a groomed trail, but on a smooth, prepared snow surface. The movement is similar to inline skating or ice skating – hence the name ‘skating’.
There are significantly more techniques in skating than in classic cross-country skiing. For beginners, the following are relevant to start with:
To get a feel for cross-country skis, which are significantly narrower than classic skis, you should first put on only one cross-country ski and leave the cross-country poles aside for now. This is because leg technique is the most important thing when you're starting out.
Put on just one cross-country ski and leave the poles aside for now. Carefully push yourself forward with your other foot and try to keep your balance and glide a little. Try this a few times and then switch legs. If this works well, you can move on to the next exercise.
To start gliding, you first need to gain momentum. As cross-country skis are very slippery, it is important to push yourself forwards sideways with the inside edge. You should then try to glide on the other ski. This is very difficult at first, so you should use a classic cross-country ski trail for this exercise. Place your right leg in the left track of the trail (this is the ski that should now glide). Push yourself forward with your left leg, which is in a ‘V’ position to the other leg. Do this exercise for about 50–100 metres and then repeat it for the other leg.
Once you can maintain your balance and push off properly, you can try out the skating technique. It is best to practise this without poles at first. To do this, stand on the skating track with your cross-country skis in a ‘V’ position: ski tails together, ski tips apart. Now start with one leg, e.g. your left, and push yourself forward. Try to glide on your right ski for as long as possible. Then bring your left ski up in a skating step (it may cross behind your feet in the air), put it back down in a gliding motion and push off with the inside of your right cross-country ski. This will allow you to glide on the left side.
Once you have mastered this sequence of steps, you can add the cross-country poles.
The 1:1 technique is the most versatile skating technique. It works on flat terrain and on gentle inclines. The poles are used in parallel to the skating technique as follows: Choose one leg. Whenever you push off with this leg in the skating stride, you simultaneously stick both poles into the snow just in front of the binding and push yourself forward powerfully with your arms. When pushing off with the other leg, you do NOT use the poles. This gives you more momentum and the gliding phase on the other ski lasts longer. Make sure you change your leading leg regularly to avoid putting too much strain on one side (approx. every 50-100 metres).
The leading hand technique is mainly used on hills for ascents, or when strength and endurance are running low. The leading hand is positioned towards the hillside and moves further forward than the other hand. The skis are positioned slightly more parallel to the hill. This prevents you from sliding backwards on the slope. Otherwise, the technique is similar to the double-poling skating stride.
Braking in cross-country skiing is similar to skiing: with the snowplough! Bring your skis into a V-position (tips together, tails apart), press the inner edges into the snow and build up pressure. The more pressure, the stronger the braking effect. This technique works for both classic cross-country skiing and skating.
Even though learning the technique can be challenging at first, once you've mastered the basics, cross-country skiing is one of the most enjoyable winter sports. After a two-day course or a few days of practice on your own, you'll be gliding confidently along the trails and enjoying the winter scenery. The sport is easy on the joints, inexpensive and suitable for all ages.
Your next steps as a cross-country skiing beginner:
1. Decide: classic (easier) or skating (more athletic)?
2. Get the necessary equipment
3. Book a beginner's course or start on a short blue trail
4. Enjoy the exercise, the fresh air and the tranquillity of the winter landscape!
Are you now keen to learn cross-country skiing? Then hire your equipment from SPORT 2000 rent and start your cross-country skiing adventure. Have fun on the trails!
When cross-country skiing, beginners tend to make three typical mistakes: Firstly, many people use their poles too timidly, which means they lack momentum and can hardly move forward. It is important to use your poles powerfully and push your arm all the way back. Secondly, the push-off often happens at the wrong time (too early or too late), causing you to slide backwards instead of gliding. The solution: an explosive, powerful push-off exactly when the pole makes contact with the snow. The most common mistake is a gliding phase that is too short – many beginners ‘march’ through the snow with their cross-country skis instead of gliding. Therefore, shift your weight completely onto the gliding leg and maintain your balance for as long as possible.
Three mistakes are also typical when skating: Incorrect body position (upper body too upright or too far back) often leads to falls. Make sure you lean forward slightly with your centre of gravity over the gliding ski. Many beginners also fall into the trap of ‘flapping around’ – too many short steps without a proper gliding phase cost an enormous amount of energy. Push off powerfully and glide as long as possible on one ski. The third common mistake is flailing your arms wildly. Your arms flutter uncontrollably instead of transferring power in a targeted manner. Instead, use calm, powerful pole pushes in sync with your leg push-off.
Start with 3-5 kilometres on a blue trail. That may not sound like much, but it's challenging enough for beginners! After about 5-10 tours, you can often try distances of 8-12 kilometres. It's important to listen to your body and not overdo it – sore muscles the next day are normal, but complete exhaustion is not.
Our clear recommendation: YES! Even though cross-country skiing looks easy, it is more technically demanding than you might think. In a professional course, you will learn the correct technique right from the start – this saves time, frustration and makes it much more fun. The trainer will immediately recognise and correct any mistakes you make at the beginning (e.g. too short a gliding phase, tentative use of poles, incorrect push-off).
Of course, it is possible to learn cross-country skiing without a course, but it usually takes longer. In this case, use videos to prepare, take an experienced companion with you and be patient when practising. Pay particular attention to the long gliding phase and avoid the most common mistake that creeps in without professional instruction!
Cross-country skiing is comparable to jogging in terms of intensity. If you are generally fit and can manage a leisurely run, you can usually also cross-country ski – right from day one! In addition, normal mobility is completely sufficient – so you don't need to be a yoga expert – and you will automatically train your coordination while learning to cross-country ski.